

A friend of mine recently told me that she was asked who she wanted with her if she were stuck on a deserted island. Her answer?
Me.
Me? Really?
I was flattered, but then she went on to explain why.
A) I was athletic and therefore would be able to shimmy up coconut trees to get the coconuts.
B) I was an engineer and therefore would be able to build a raft to take us to civilization.
C) I’m a good cook, so I can at least make a decent meal out of the coconuts I picked.
I felt so honored to have such resume worthy attributes (really, this should all go on my resume!). But, here is the reality of it all.
A) I am a runner, triathlete and most recently, a crossfitter. So, unless coconuts (or other foods) are harvested by me running around the island for miles (or biking or swimming), or require me to “pick things up and put them down” in quick succession, I might need to start adding some coconut tree shimmies into my workout routines.
B) I am a Mechanical Engineer in the HVAC field. To be more specific, I design stuff, not so much build stuff. So, unless we needed to air condition the raft, I can specify and design, but building would be the contractors job. Just in case, I’ll keep a blow up raft near me at all times.
C) Damn straight I can make stuff out of coconuts!

Coconut Banana Cream Pie (adapted for a variety of sources, mushed together by me)
To make pie, first you need a pie crust!
Since this was a cream pie, I needed a pre-baked crust since the pie doesn’t actually get baked as a whole when fully assembled. So, I went to the trusty Pie and Pastry Bible by Rose Levy Beranbaum for her Sweet Cream Flaky Pie Crust for a 9″ pie.
Sweet Cream Flaky Pie Crust (The Pie and Pastry Bible by Rose Levy Bernabaum)
Gather 1 stick of unsalted butter. Cut 5 tablespoons of the butter into 3/4″ cubes, wrap in plastic and put into the fridge. Cut the other 3 tablespoons of butter into 3/4″ cubes, wrap in plastic and let that hang out in the freezer. The butter should hang out for at least 30 minutes.
Put 6.5 oz of all purpose flour and 1/2 teaspoon salt into a gallon capacity plastic zip top bag and put that in the freezer to hang out for at least 30 minutes
After 30 minutes, pour the flour mix into the food processor fitted with the metal blade and pulse a couple of times. Keep the bag.
Put the 5 tablespoons of refrigerated butter into the flour mix (I like to spread the cubes out as opposed to just dumping it into the mixture), and pulse until it looks like a course meal.
Put the 3 tablespoons of frozen butter into the mix (again, spreading it around) and pulse until the butter is pea sized.
Drizzle in 5 tablespoons heavy cream over the mix and then pulse until it looks like little particles. Give the mix a pinch, and if it sticks together, then it is done.

Pour the mix into the bag you had the flour mix in before, and keeping the top of the bag upright, knead the mixture from outside the bag until it comes together into one piece.
Take the dough out of the bag and in plastic wrap, shape into a disk and place in the fridge for at least 45 minutes (better overnight).
After 45 minutes (or the next day), take the disk and roll it out so it would fit into a 9″ pie plate. If it starts to get really sticky and tough to handle, throw it back in the fridge for 5 minutes and try again. Preheat the oven to 425 degF.

No one sees the inside anyway!
Place the rolled out dough into the pie plate and patch as necessary, and make the fancy crimped pie edges if you wish. Then, take a sheet of parchment paper and line the pie crust, making pleats as necessary. Basically you are making a liner for the weight that needs to be added on top of the crust as it bakes naked.

I used rice as my pie weight because it’s cheap and reusable for this purpose (just not cookable after!). Use enough rice to fill the pie and to ensure that all the edges are snugly pressed in by the rice. Put into the oven and bake for 20 minutes.

Take the pie out, and carefully lift out the parchment paper and rice and place it into a cake pan. Take a fork and poke all over the bottom and sides of the crust and return to the oven for 5-10 minutes (until the crust looks pale golden brown). Check it every few minutes and if you see a part of the crust bubbling a bit, poke it with a fork.
Once the crust is done, remove from oven and bump the temperature down to 350 degF. Place the pie crust somewhere to cool.
And now the coconut cream part…
Coconut Cream filling (adapted from Coconut Cream Pie by Joyofbaking.com)
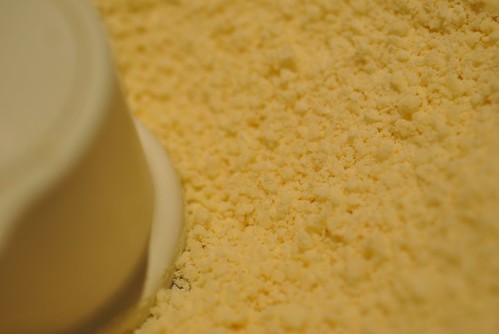
First make the toasted coconut by spreading out 1.5 cups of coconut flakes (I used sweetened because it was all I could find) on a baking sheet and put in the 350 degF oven. I was super paranoid about over toasting, so I pulled it out of the oven every 3 minutes and gave it a good stir and put it back in. I did this for maybe 15 minutes, until the flakes were lightly browned and toasted. Set aside.

Toasted Coconut
In a medium saucepan, pour in 1.75 cups of whole milk plus 1.5 cups of unsweetened coconut milk, and put over a medium – low flame and heat until just about boiling but not. I heated until I saw some steam coming off the top and tiny bubbles started forming along the edge.
As that is heating up, in a heat proof bowl, whisk together 4 egg yolks and a 1/4 cup of whole milk.
In another small bowl, mix together a light handed 2/3 cup of sugar with 1/4 cup of cornstarch and 1/4 teaspoon of salt. Add this mix into the egg yolk mix and whisk until smooth.
Now time to temper!
When the milk mix is heated up, take a ladle and ladle a little bit of the hot milk into the egg yolk mix while whisking constantly. Then, take a fuller ladle and repeat. Pour in one more ladle-ful while whisking, then pour in the rest of the milk mix into the yolk mix, while whisking. This will help prevent you from cooking the eggs by adding in something hot too fast.
Pour the mixture back into the saucepan. Over a medium-low heat, whisk the mixture until it comes to a boil, and gets thick and custard like.

Take it off the heat and whisk in two tablespoons of diced butter and 1 teaspoon of vanilla extract. Then mix in about a cup of the toasted coconut. Put the rest of the toasted coconut in an air tight container for the finishing touches.
At this time the crust should be totally cool (mine was cool, but the pie plate was still slightly warm, but I was in a hurry). Pour the custard into the crust, cover with plastic wrap and put it in the fridge for 4 hours (overnight is best) for it to set.
Meanwhile, put a can of coconut milk in the fridge.

My preferred Coconut Milk
Once it is set, time to finish it off!
It is going to need a whipped cream topping.
First freeze you mixing bowl and wire whisk attachment for about 15 minutes.
Open up the can of coconut milk from the fridge and scoop out the white cream that has separated on top. Save the clear liquid for other stuff (like thinning out some oatmeal!)
After 15 minutes, set up the mixer and pour about 1 cup of heavy whipping cream into the bowl and start to whip. Once you get soft peaks, add in the coconut cream and continue whipping until it looks creamy and more like a whipped cream consistency. Add in about 2 heaping teaspoons of confectioners sugar and whip until incorporated.
Slice up 4 bananas on the bias.
Pull the pie out of the fridge and put down a layer of bananas on top of the custard. Spread the whipped cream topping on top and then layer another layer of bananas on top. Sprinkle the remaining toasted coconut on top of the bananas.
Put it in the fridge for a little bit so everything can set. Then serve!

A few things I’ve learned and should be noted:
It is a time consuming process, and best if done the day before you plan on serving it.
Do not tip the bowl of the food processor without remembering that the blade is not attached and will fall out and almost hit your foot, while taking a good amount of pie crust particles with it. Remember to pick up said blade once you put the bowl back down. Not after awhile where you forget there is a sharp blade by your foot. Perhaps I should wear shoes next time (I didn’t cut myself, but it was close!).
Bananas do brown over time, especially overnight in the fridge, so you want to save that step for right before serving.
This pie needs to set. Overnight is best. The whipped cream topping somehow does not travel well, and gets a bit melty quickly. If you plan on driving it somewhere, make sure you can put it in the fridge at your destination to let it set back up a bit before serving. Definitely not a beach food.

Overall, there seems to be a positive response to the pie. It isn’t overly sweet or creamy and the coconut flakes give it a nice texture contrast. The pie crust is super awesome. I cannot even believe I made it given my poor luck with pie crusts in the past! It still is my favorite part. It was flaky and buttery and oh so delicious! The custard was really good without being heavy or teeth jarringly sweet. Even my mother approved!
I was so excited about it, I woke up the next morning after letting it set up in the fridge overnight, and had a slice for breakfast. The perks of being a single gal who likes to bake.

Pie…the breakfast of awesomenss

I need to come back to NY.
I totally concur…I can make more if you need more reasons to! 🙂